开发环境搭建
整体介绍
- Node.js环境
参考文档
- git环境
参考文档
- IDE
介绍最常见的Webstorm与vscode的使用方式
- 虚拟机
主要是windows与macOS平台下的虚拟化介绍,用于搭建docker环境,后续的开发环境全部建立在docker之上,安装在Linux环境(虚拟机)之内。
如果大家想使用云服务器,可以考虑购买各大云服务商的2C4G的配置,磁盘最少要40G(配置4G的swap),最好按量付费,用完即删。
- Linux入门
常见的Linux命令,可以上手即可,比如:vim编辑器、常见的文件操作命令、更新包安装包的命令等。
homebrew(macOS包管理工具)
简介
Homebrew是一款包管理工具,目前支持macOS和Linux系统。主要有四个部分组成: brew、homebrew-core 、homebrew-cask、homebrew-bottles。
| 名称 | 说明 |
|---|---|
| brew | Homebrew 源代码仓库 |
| homebrew-core | Homebrew 核心源 |
| homebrew-cask | 提供 macOS 应用和大型二进制文件的安装 |
| homebrew-bottles | 预编译二进制软件包 |
brew官网:https://brew.sh/(opens new window)
brew安装&卸载
推荐安装脚本
项目地址1:https://gitee.com/cunkai/HomebrewCN(opens new window)
项目地址2:https://brew.idayer.com/(opens new window)
安装
用命令行安装工具前先检查一下子,用于在Mac上安装或更新的Xcode的命令行工具
|
没安装的话先进行安装
|
苹果电脑标准安装脚本:(推荐 优点全面 缺点慢一点)
|
苹果电脑极速安装脚本:(优点安装速度快 缺点update功能需要命令修复 )
|
Linux 标准安装脚本:
|
卸载
苹果电脑卸载脚本:
|
Linux卸载脚本:
|
brew使用,手动设置镜像
中科大源
|
清华大学源
|
设置 bottles 镜像
设置环境变量需要注意终端的类型,可以先通过以下方式获取:
执行命令echo $SHELL,根据结果判断:
/bin/zsh=>zsh=>.zprofile/bin/bash=>bash=>.bash_profile
然后继续正式操作,以中科大源为例:
从macOS Catalina(10.15.x) 版开始,Mac使用zsh作为默认Shell,对应文件是.zprofile,所以命令为:
|
如果是macOS Mojave 及更低版本,并且没有自己配置过zsh,对应文件则是.bash_profile:
|
注意:上述区别仅仅是
.zprofile和.bash_profile不同,上下文如有再次提及编辑.zprofile,均按此方法判断具体操作的文件。
至此,安装和设置操作都完成了。
恢复默认源
|
homebrew-bottles配置只能手动删除,将 ~/.zprofile 文件中的 HOMEBREW_BOTTLE_DOMAIN=https://mirrors.xxx.com内容删除,并执行 source ~/.zprofile。
nuxt项目如何本地使用https
1、开发环境使用 mkcert(最佳开发方案)
|
2、Node.js 如何设置信任 mkcert 生成的 CA 根证书
如果不设置,会导致 Nuxt 内部 fetch(例如 manifest.json)全部失败。
|
本地开发环境
IDE
- WebStorm(收费):https://www.jetbrains.com/webstorm/
- VSCode(推荐):https://code.visualstudio.com/
- Atom:https://atom.io/
- Hbuilderx:https://www.dcloud.io/hbuilderx.html
- 微信开发者工具:https://developers.weixin.qq.com/miniprogram/dev/devtools/download.html
- 谷歌浏览器:下载地址
Vue-CLI
Vue官方的开发CLI工具 (opens new window),安装Node之后,使用npm命令安装:
|
CLI 服务是构建于 webpack (opens new window)和 webpack-dev-server (opens new window)之上的。它包含了:
- 加载其它 CLI 插件的核心服务;
- 一个针对绝大部分应用优化过的内部的 webpack 配置;
- 项目内部的
vue-cli-service命令,提供serve、build和inspect命令。
如果你熟悉 create-react-app (opens new window)的话,@vue/cli-service 实际上大致等价于 react-scripts,尽管功能集合不一样。
测试环境
虚拟机自建环境(不推荐,比较麻烦)
- Parallels -> 针对 macOS
- VMWare -> 全平台
- Hyperv -> Windows平台支持
云服务器(推荐)
阿里云:https://cn.aliyun.com/(opens new window)
腾讯云:https://cloud.tencent.com/(opens new window)
华为云:https://www.huaweicloud.com/(opens new window)
AWS:https://aws.amazon.com/cn/(opens new window)
Docker服务(推荐宝塔一键安装)
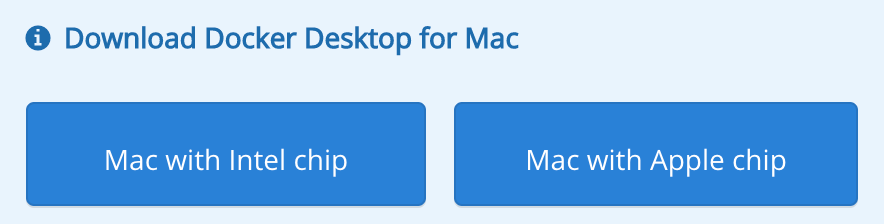
macOS:https://docs.docker.com/desktop/mac/install/ (opens new window)里面有两个很大的按钮(按照自己的CPU版本来选择):
Linux:https://github.com/docker/docker-install(opens new window)
推荐使用get-docker的脚本:
curl -fsSL https://get.docker.com -o get-docker.sh
sh get-docker.shWindows:https://hub.docker.com/editions/community/docker-ce-desktop-windows(opens new window)
安装docker-compose集成命令(只针对Linux)服务:https://docs.docker.com/compose/install/(opens new window)
|
Desktop下载后,自己会带docker-compose,不需要另外安装
Docker加速服务
- 阿里云加速器(点击管理控制台 (opens new window)-> 登录账号(淘宝账号) -> 右侧镜像工具 -> 镜像加速器 -> 复制加速器地址)
- 网易云加速器
https://hub-mirror.c.163.com(opens new window) - 百度云加速器
https://mirror.baidubce.com(opens new window) - 科大加速器
https://docker.mirrors.ustc.edu.cn/ - 七牛云加速器:
https://reg-mirror.qiniu.com
Linux中设置/etc/docker/daemon.json:
|
Mac/Windows上设置:
|
使用docker info查看是否设置生效:
|
终端bash&zsh&fish对比
bash
默认的shell工具,大多的Linux系统自带的。
bash2也有自动补全与语法高亮,工具bel.sh(opens new window)
zsh
zsh相对于bash 高可配置、高扩展。目前是mac上的默认的shell工具。推荐它的主题网址:https://ohmyz.sh/(opens new window)
通过扩展可以获得如下功能:
- 自动补全
- 语法高亮
- 插件系统(插件管理)
- 命令行提示(git仓库)
- 颜色主题
下面截图的就是一个示例,这些都需要手动设置。

bash 与 zsh已经诞生大概有30年了历史了。
fish
特点
官网:https://fishshell.com/(opens new window)
相比于zsh,fish会有很多自动化的配置,默认的安装即可。
特点:
- 命令历史
- 自动补全、自动搜索
- 语法高亮
- 运算+逻辑
- 运行行颜色设置
安装方法
安装方法:
macOS上:
|
windows上可以通过
- MSYS2 (opens new window)命令:
pacman -S fish - 安装配置CygWin (opens new window),在安装的过程中可以选择fish作为默认的shell
美化&扩展
omf就是fish的一个插件管理工具,扩展fish主题配色,项目地址:https://github.com/oh-my-fish/oh-my-fish (opens new window)。
还有一个插件管理工具是fisher:https://github.com/jorgebucaran/fisher(opens new window)
强烈推荐starship来美化你的fish shell,地址:https://starship.rs/ (opens new window),安装方式:
- brew方案:
|
- Linux
|
添加配置:
|